For Second Gen Camping Tent Instructions, please visit the link below.
– Part 1: Description of contents
– Part 2: Setting up the tent
– Part 3: Takedown of the tent
– Part 4: Folding the tent demonstration video
Part 1: Description of contents

A: Tent Roof Cover: The purpose of the tent roof cover is to ensure additional protection during rain. It covers the entire roof of the tent. It attaches to the main tent via metal clips (carabiners) in all four corners.
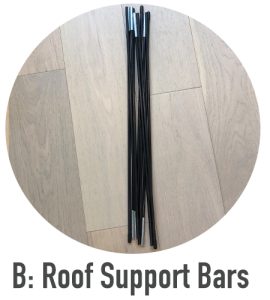
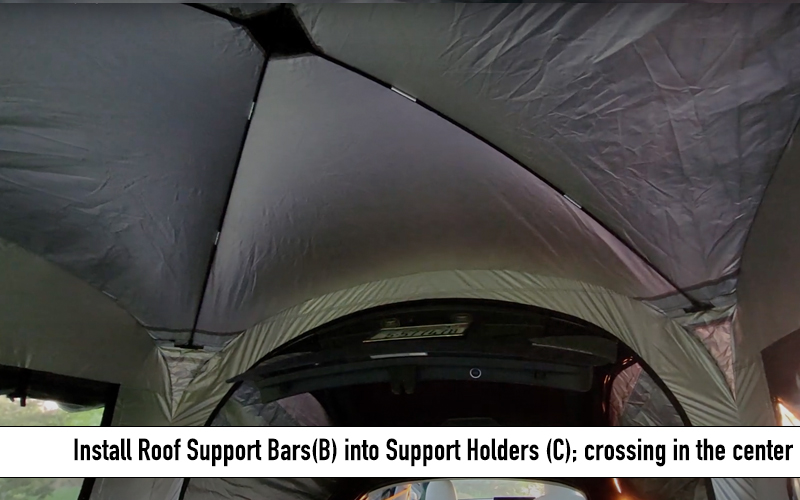
B: Roof Support Bars: The purpose of these support bars is to maintain an arching dome in the centre of the tent roof. There are 2 bars in total. These go criss-cross on the inside of the tent and held by support bar holders in the four corners. These are thinner bars compared to the awning post bars.
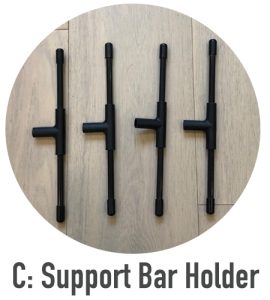
C: Support Bar Holders: The purpose of these to hold the roof support bars in place. There are four pieces in total. One of each goes in the top corners on the inside of the tent. They are held in place by the slots woven into the tent at each of the four corners.
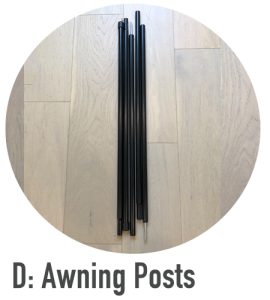
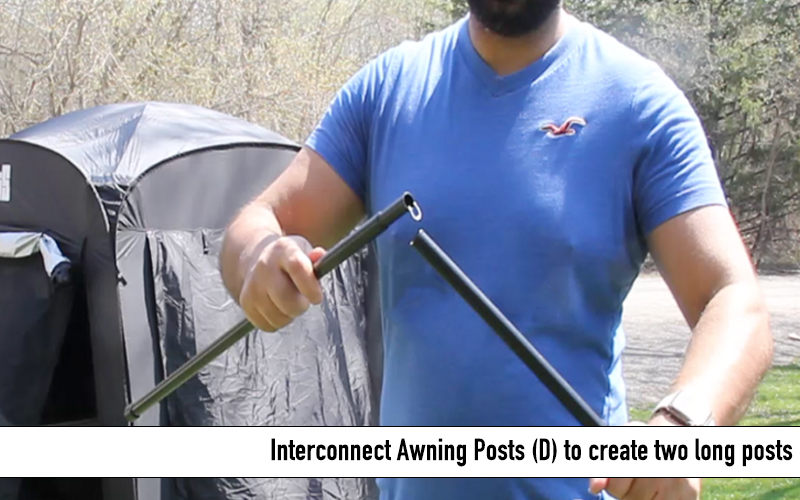
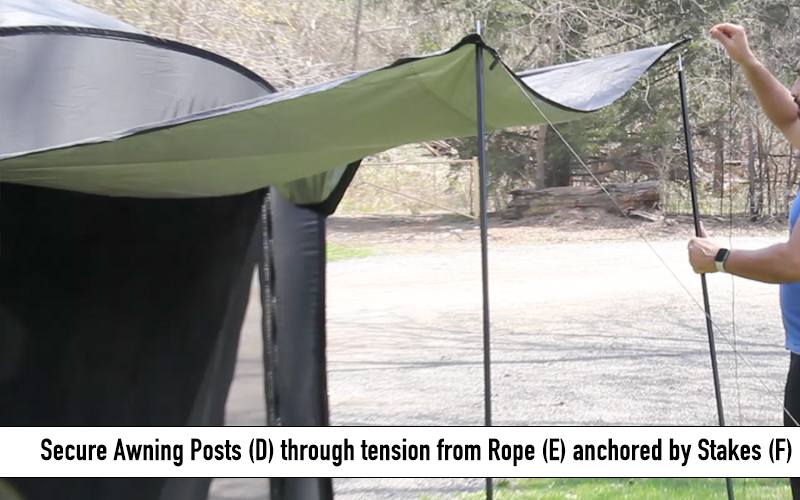
D: Awning Posts: The purpose of these posts is to hold the awning upright. The ends of the posts slide into each other to create two long posts. The pointy ends face the top while the smooth plastic end at the bottom. They are held upright from the tension in the ropes (Shown as E)
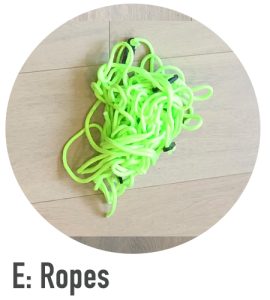
E: Ropes: The purpose of the provided rope is to anchor the tent into the ground. The tension in the ropes is maintained by tying the rope from various anchor points on the tent to the stakes (Shown as F)
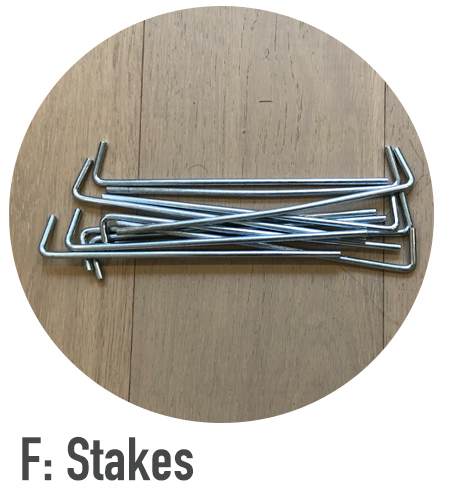
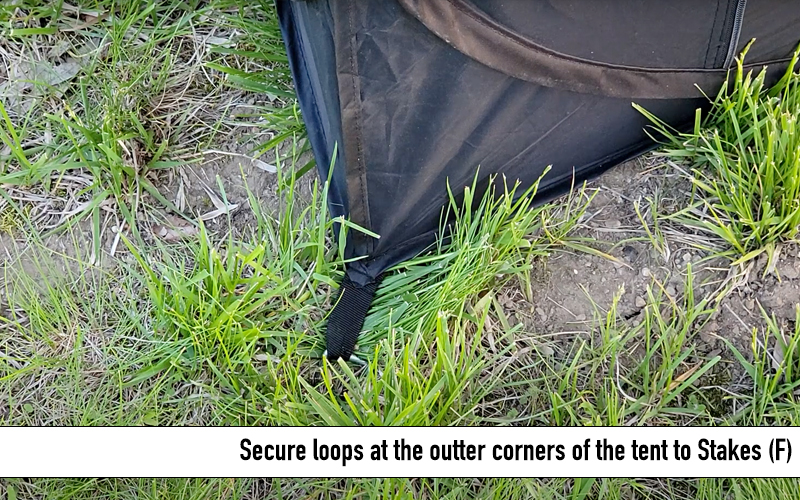
F: Stakes: The purpose of the provided stakes is to anchor the tent into the ground. The tension in the ropes (F) is maintained by tying the rope from the tent to the stakes.
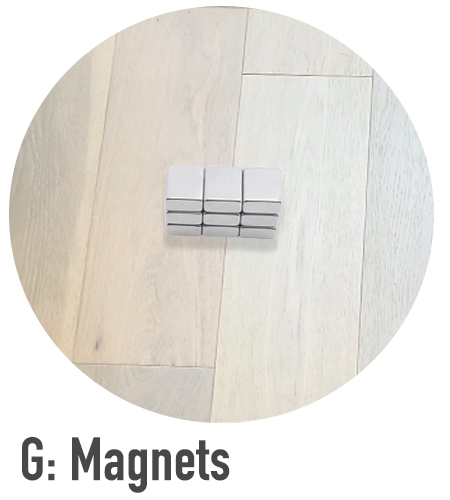
G: Magnets: The purpose of the magnets is to close the gaps along the quarter panels (behind rear doors) of the Model Y. Caution: The magnets are extremely strong and could damage the paint if used without adequate padding.
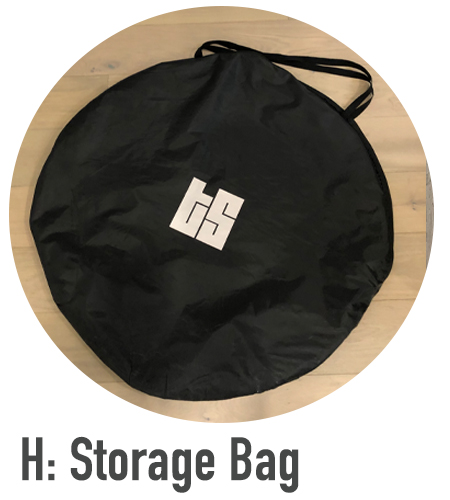
H: Storage bag: The bag is used to store away the tent and the accessories when not in use.
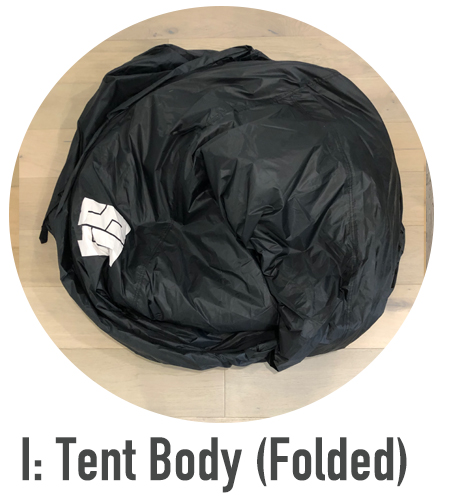
I: Tent Body: Obvious by its size, it is the main tent body. It is a single piece. There are steel cables that form the frame of the tent. It is designed to spring open for a quick setup and folded back into a circle for convenient transportation and storage.
Part 2: Setting up the tent
Step 1: Open up the Tent:
Once you are happy with the location of your setup, start by opening up the tent from its circle. The tent should spring open on its own. Initially, tent should spring up open as flat. Once you have it flat and upright, one of the sides should open up like a book.
At this point, it is recommended to get help of an additional person. While one person is holding the tent firm, the second person should pull the from the vertical middle line at the very centre diagonally.
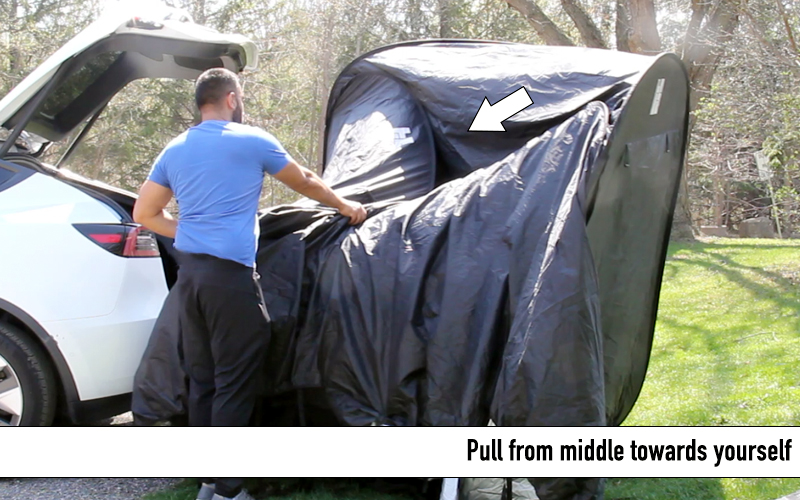
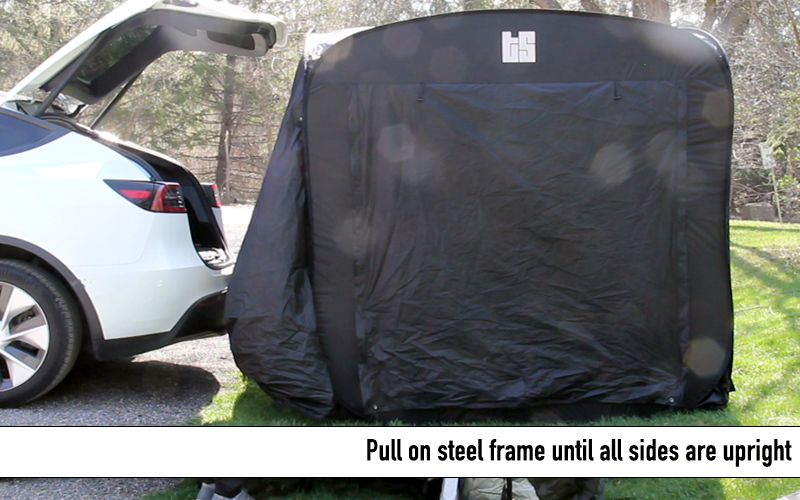
Keep pulling on all the ends (with help of a second person) while grabbing by the steel frame, and the tent should eventually stand upright on all four sides.
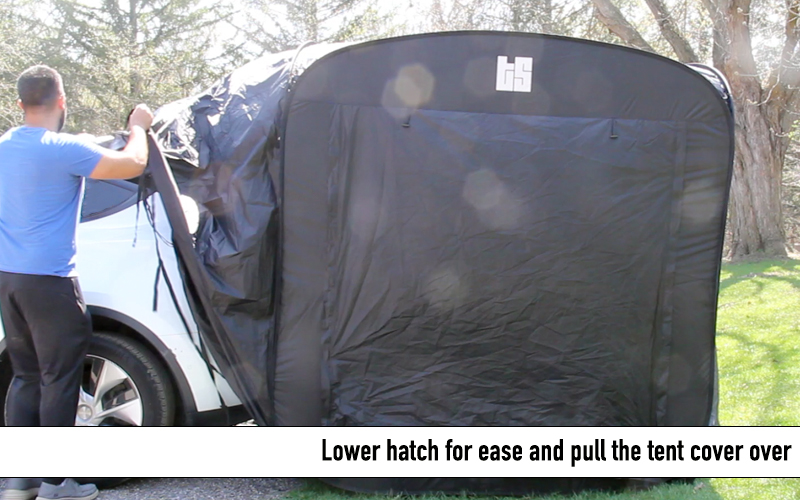
Step 2: Move tent over the hatch and align it with your Model Y:
The side that has many straps and additional material hanging loose is the one that faces the Model Y. Then grab the loose ends of top most cover and move it over the hatch door. You may temporarily lower the hatch door to easily get it over.
Once the hatch is covered, roll up one side of the screen and secure it open using the two black loops with plastic ends onto the tent itself. This will allow you to easily get in and out of the tent for remainder of the setup.
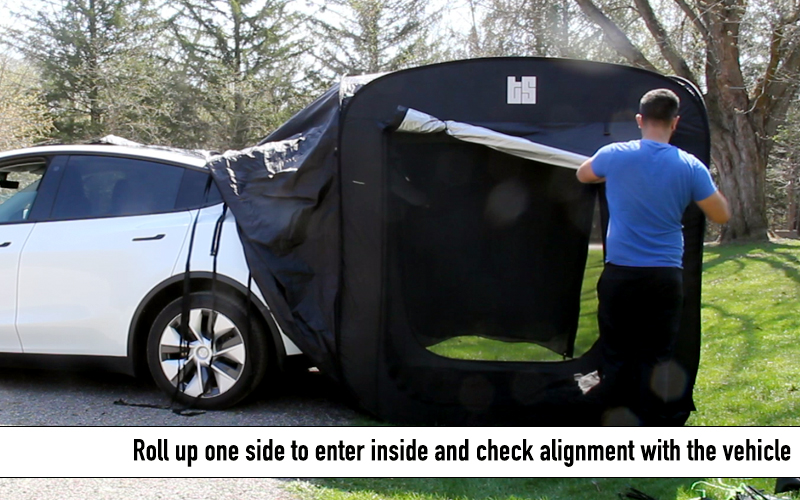
When inside, open up the side towards the vehicle. You can roll down and secure the screen using the two black loops with plastic end on the bottom side. Once you have a clear view, have a look around to align the tent and centre it with the vehicle. You may extend the hatch door fully open at this stage. You may also want to push the entire tent towards the vehicle so it is fully touching the rear bumper.

Step 3: Secure the straps around Model Y:
Once you are happy with the position of the tent, the next step is to secure the straps to the vehicle.
This is particularly useful on a windy day. However, not all straps may be needed specially on a calm day. You may choose to not connect some of the straps. Feel free to use your judgement.
The diagrams below shows how the straps are secured.
Repeat the process for both of the sides.
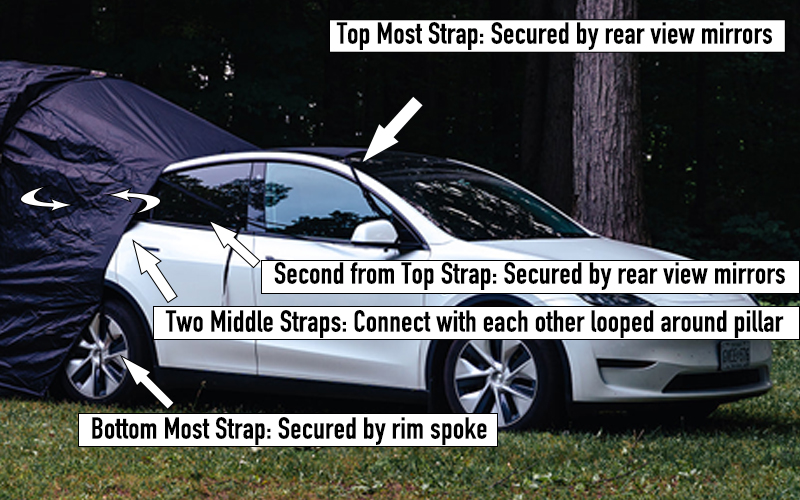
Bottom strap: This is the easiest of all, you can tie the end with spokes of the rim.

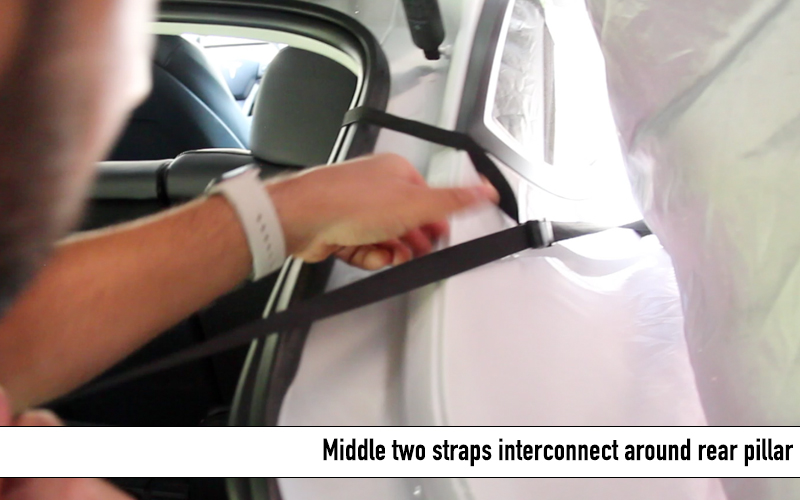
Two middle straps: These two straps interconnect with each other. You have to open the rear door and channel one of the strap from inside the vehicle, loop it around the rear hatch and connect with the loose end.
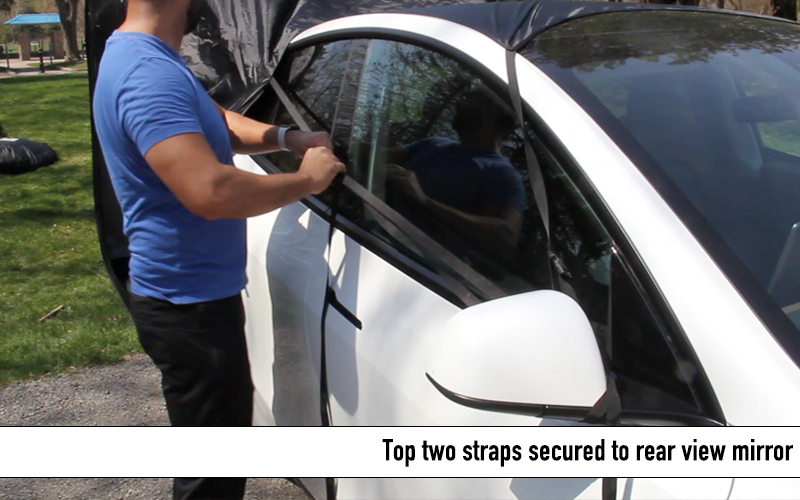
Top most strap: This strap is for the optional glass roof screen. If the roof screen is extended forward, then you can secure the end of the strap by the rear view mirror. You also have the option to keep this roof screen rolled back and secured using the two black loops with plastic ends.
Second from top strap: This is the longest of the straps. You can secure it to the rear view mirrors as well. You may need to adjust the length of the strap for a good fit.
Step 4: Setup the roof support bar inside the tent
Next step is to install the crossbar on the roof of the tent. These are held in place using the Support Bar Holders (C). There are pockets to hold the T shaped support bar holders on each of the four sides. Start by installing these on all four sides.
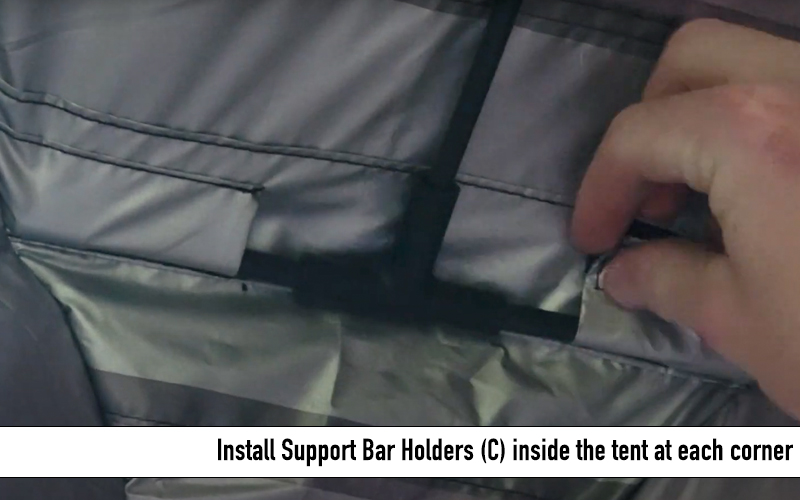
Once the Support Bar Holders (C) are in place, interconnect the Roof Support Bars (B) to create two long bars. Then channel each bar from the center loop and ends of the bar into the Support Bar Holders (C) on each end. Repeat the same for the second bar while cross-crossing at the center.
Step 5: Secure tent using stakes
There are several points along the tent to secure the tent to the ground. These are particularly useful on a windy day.
Step 6: Setup the front porch (Awning)
Start by inserting the ends of the Awning Posts (D) into each other. There are three pieces per post. In the end, you will have two long posts with pointy side on one end and plastic base on other end.
Then stick the pointy end through the hole lined with metal on the tent screen. The awning post is held upright by creating tension. This tension is created by tying the ends of the corner of the tent screen using Rope (E) and anchored to the ground using Stakes (F).
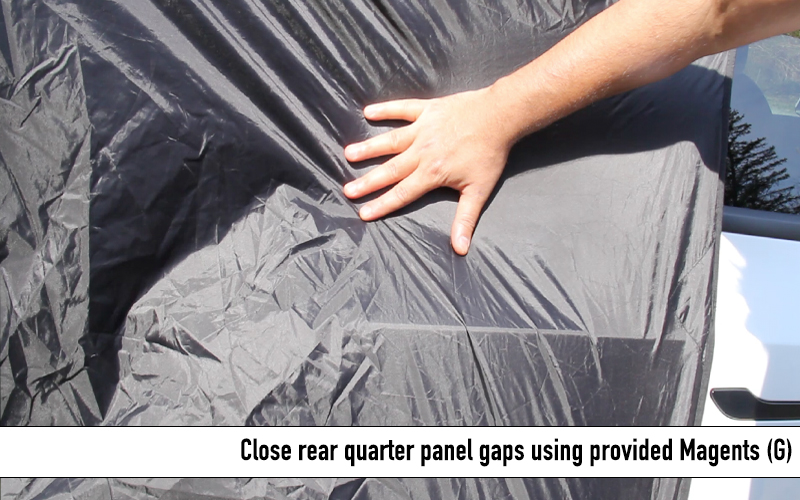
Step 7: Close the gaps using magnets
WARNING: The magnets provided with the tent may cause scuffs/scratches if used without any padding. Please make sure the magnets are adequately padded before use.
The gaps around rear quarter panel can be closed off using provided magnets. The location of the magnets varies depending on your setup. Please use your judgement to place the magnets to close off any gaps.
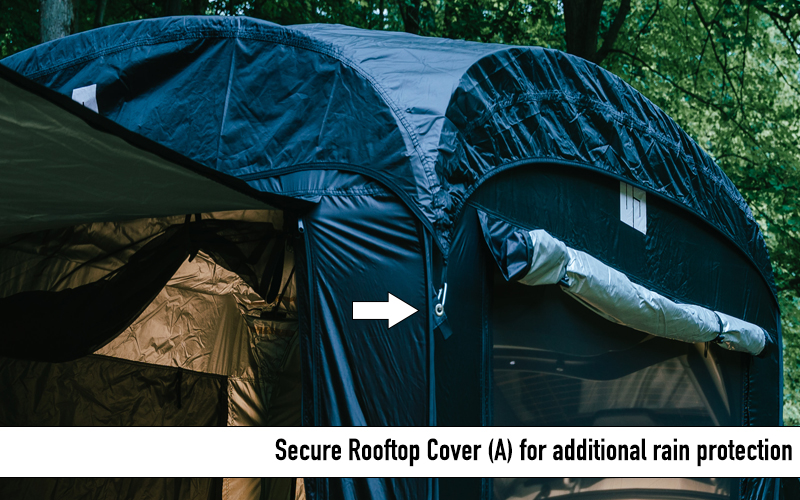
Step 8: Install tent roof cover (Optional)
Install Tent Roof Cover (A) if you are expecting rain. The roof cover provides additional protection to ensure water does not make its way into the tent. It is is held by metal clips (carabiners).
Part 3: Take down of the tent
Step 1: Start the take down process.
The takedown of the tent involves performing most of the steps in Part 2 in reverse. Start by removing the tent roof top cover, removing the magnets and then removing the straps around the vehicles.
Then remove awning posts, ropes and stakes. Then finally remove the roof support bars and roof support bar holders from inside.
Have the tent standing by itself.
Step 2: Zip up all of the screens.
Start by rolling up and zipping up the screens inside the tent for the side that was connected to the vehicle.
Then step outside and roll up and zip up all of other three sides.
Once all of the screens are zipped up, the tent is ready to be folded.
Step 3: Fold the tent like a book
The next step is to hold the tent flat like a book. Start by pushing diagonally from one of the sides. Ideally, you want to push from one of the either of the two sides that were closest to the vehicle. This is to ensure all of the straps that are hanging loose get tucked inside.
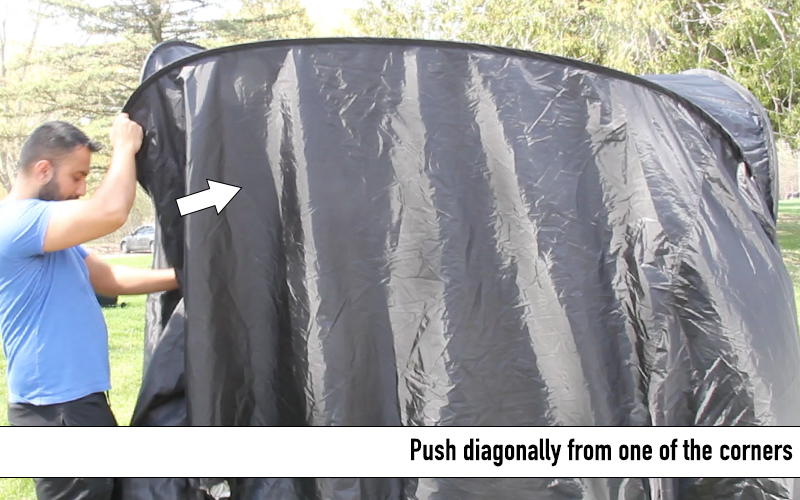
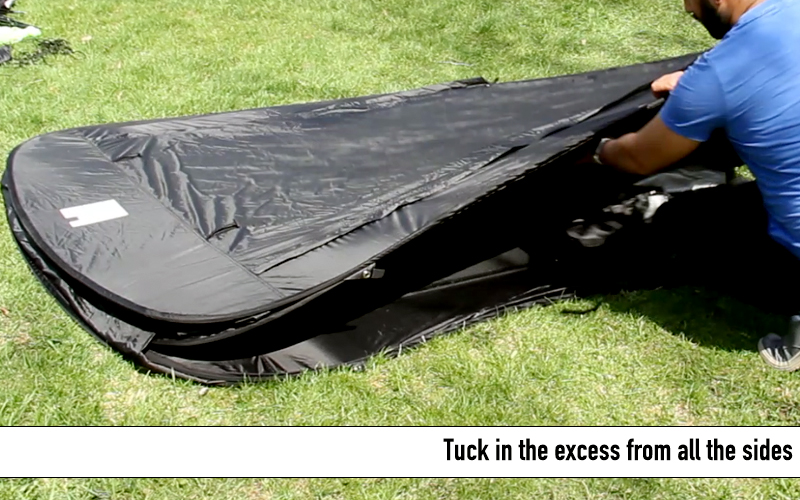
Once the corner that you are pushing is all the way in and touching the inner walls of the other side, grab the ends of the other side and close the tent like a book.

Lay the tent flat on the ground to tuck in the excess.

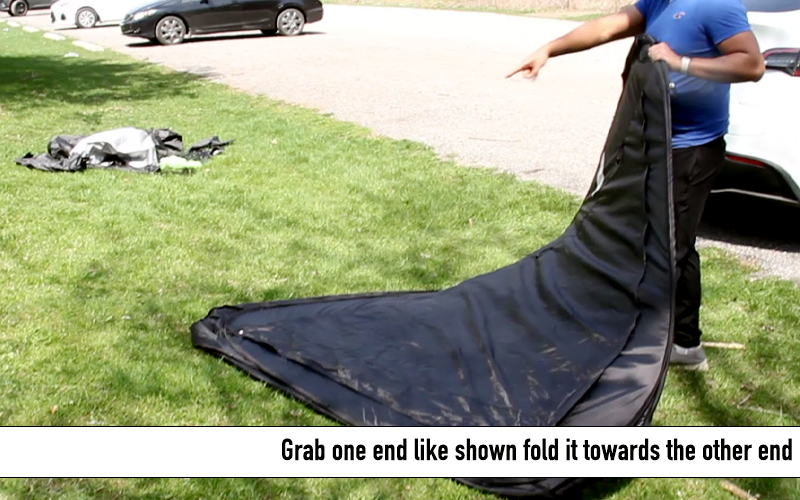
Step 4: Fold the tent like a circle
The final step is to fold the tent into a circle (I) so it can stored back into the Storage Bag (H). This can be tricky at first and may require several attempts.
Start by grabbing one of the corners and fold towards other end diagonally.
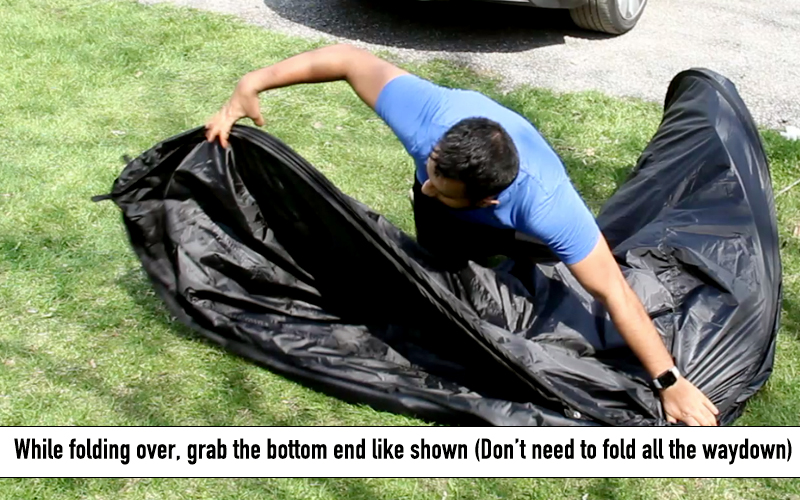
Once you get close to the other end, grab the bottom end that is sticking upwards with other hand. You do not need to fold all the way down like shown below.
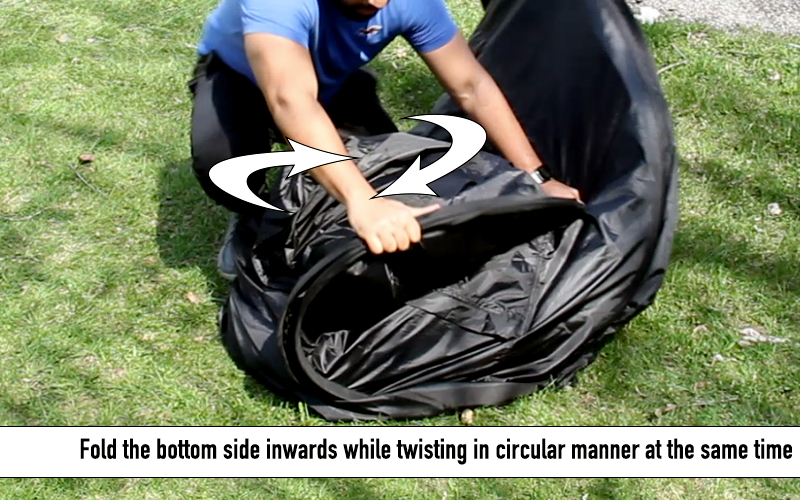
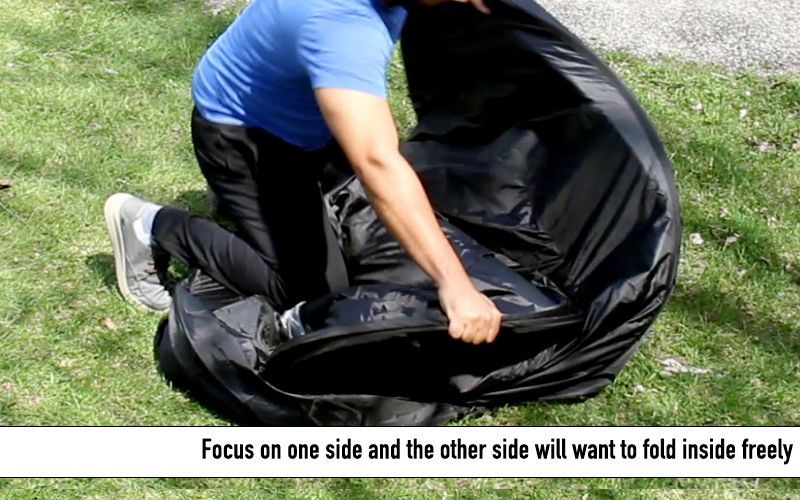
Then fold the bottom end inwards while twisting in a circular manner at the same time. You just have to focus on one end. If done right, the other end will want to close on by it self.
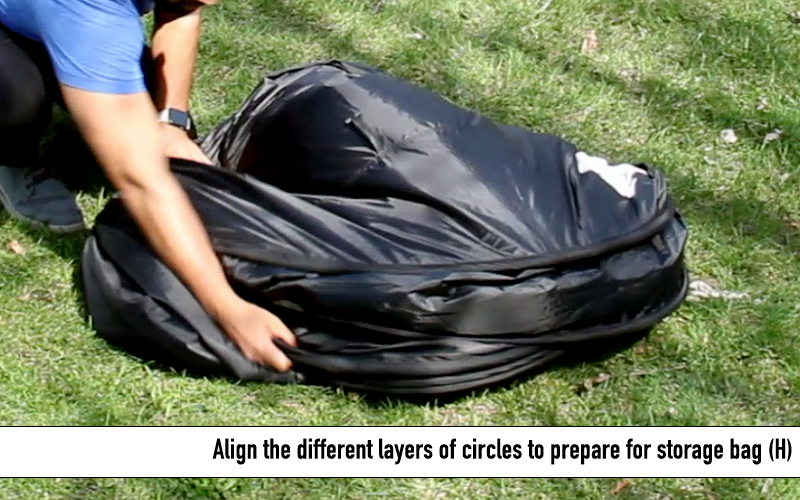
Once it is roughly folded into a circle, move it around to align the different layer of circles and prepare it for the storage bag.
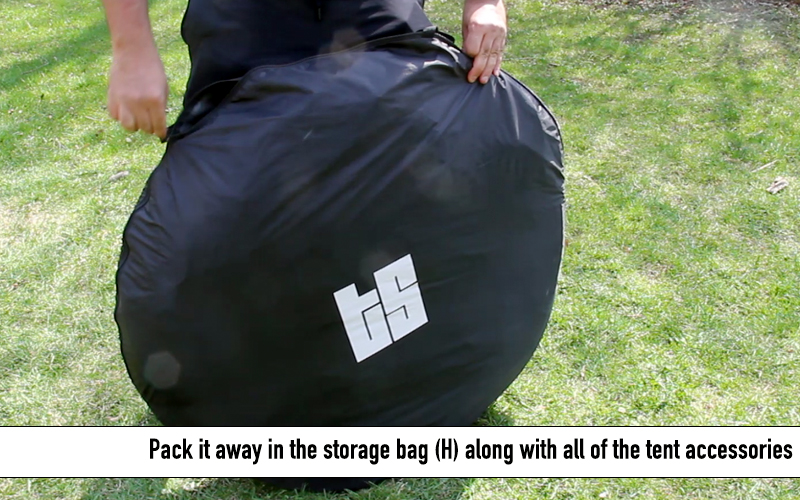
Pack it away inside the storage bag. Do not forget to include all of the tent accessories inside as well.
You are done! Hope you enjoyed your camping experience!
Part 4: Folding the tent demonstration video
Folding the tent into circle can be tricky at first. Here is a short demonstration video.